Introduction
When it involves home improvement projects, few can measure up to the beauty and sophistication of hardwood flooring. Not just does it boost the aesthetic of any area, but it additionally includes value to your home. If you've ever before thought about taking on a wood flooring installation on your own, you're in for a fulfilling difficulty. In this comprehensive overview, we'll walk you through every action of the procedure, from selecting the best materials to ending up touches. This isn't just a tutorial; it's a DIYer's dream come true!
Hardwood Flooring Setup: An Overview
What is Hardwood Floor Installation?
Hardwood floor setup refers to the process of laying down hardwood slabs in numerous patterns and styles to develop a durable and eye-catching flooring remedy. This process can be done in various ways-- nailing, gluing, or making use of click-lock systems.
Why Pick Wood Flooring?
- Aesthetic Appeal: The natural beauty of hardwood can match any home decor. Durability: With correct treatment, hardwood floorings can last a lifetime. Resale Value: Homes with hardwood floor covering have a tendency to sell faster and at higher prices.
Preparing for Your Hardwood Floor Installation
Assessing Your Space
Before you dive into your project, take some time to assess your space.
Measuring Your Room
Measure the length and width. Multiply these measurements for square footage. Add 10% for waste and cuts.Choosing the Right Hardwood
Choosing the right sort of hardwood is critical. You'll discover options like oak, maple, cherry, and hickory.
Solid vs. Engineered Wood
- Solid Hardwood: Made from strong items of wood; suitable for conventional settings. Engineered Wood: Composed of layers; much more stable in moist areas.
Selecting Finish Options
Your choice of coating will certainly affect both appearance and durability.
Types of Finishes
- Oil-based Polyurethane: Deals resilience but takes longer to dry. Water-based Polyurethane: Dries promptly; less smell during application.
Tools and Products Needed
Essential Devices for Wood Floor Installation
Having the right tools makes a globe of difference.
Table saw Miter saw Hammer or nail gun Tape measure Level Pry bar Flooring cleats (if nailing)Necessary Materials
Make certain you have everything prior to starting:
Hardwood planks Underlayment Moisture obstacle (if required) Finish product Tacks or glue (depending on your setup technique)Step-by-Step Hardwood Floor Installment Process
Step 1: Preparing the Subfloor
The success of your wood floor installment rests on a solid subfloor.
Cleaning and Leveling
Ensure that your subfloor is clean and degree:
- Remove all old flooring materials. Fill low areas with leveling compound.
Step 2: Installing Underlayment
Underlayment gives supporting and insulation.
How to Install
Roll out underlayment across the whole flooring area:
- Overlap joints by a minimum of 8 inches. Cut to fit about challenges like pipes.
Step 3: Accustoming Your Wood
Letting your timber acclimate helps protect against warping later on.
How Lengthy Ought to You Acclimate?
Generally, 48-- 72 hours in an atmosphere comparable to where it will certainly be mounted is recommended.
Step 4: Setting the First Row
Start along one wall with your initial row:
Place boards with tongue facing the wall. Use spacers for expansion voids (typically 1/2 inch).Step 5: Installing Succeeding Rows
Continue with subsequent rows using a staggered pattern:
Tips for Staggering
Aim for arbitrary lengths for visual appeal:
- Avoid lining up joints; this boosts stability.
Step 6: Nailing or Gluing Down Boards
Secure each board according to your selected approach:
Nail Down Method
If pin down:
Use floor covering cleats every 6-- 8 inches. Ensure no nails are holding up above the surface.Glue Down Method
If gluing:

Finishing Touches After Installation
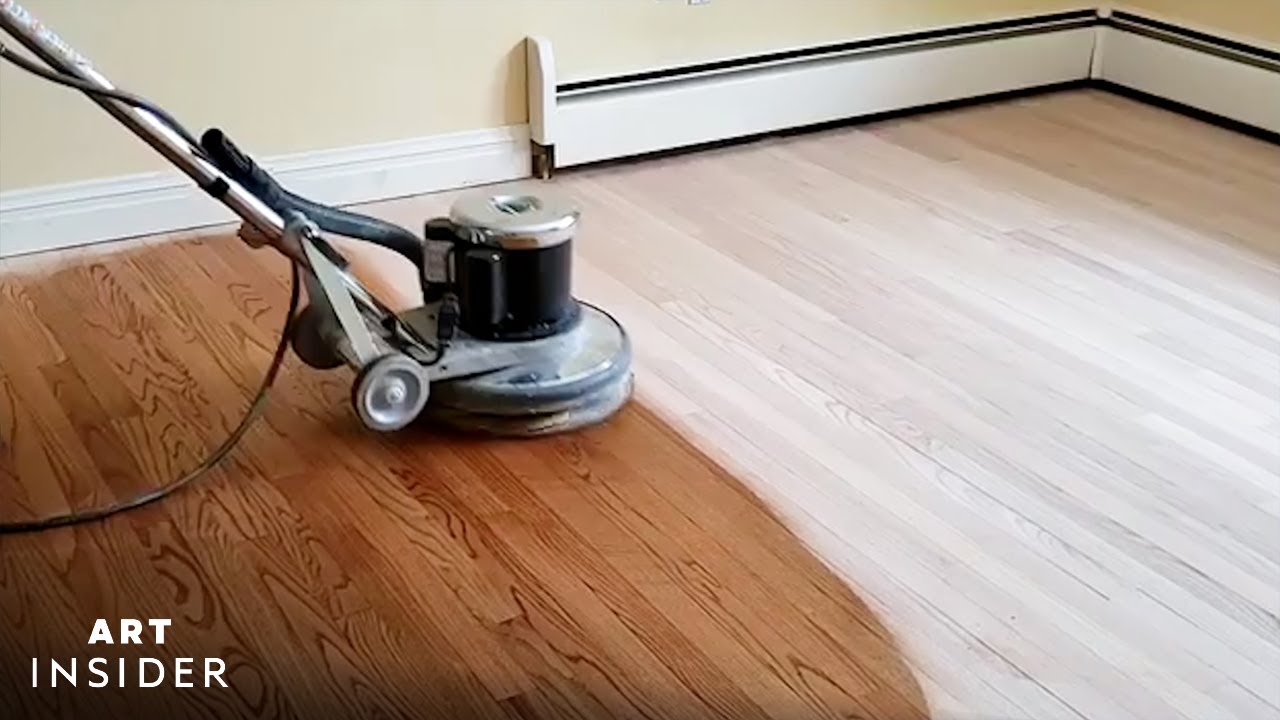
Sanding Your New Floors
Once your boards are set, fining sand is commonly needed if they have actually not been pre-finished.
How to Sand Properly
Use an orbital sander after making certain all edges are smooth:
- Start with crude grit sandpaper before moving to finer grits.
Applying Finish
Time for that stunning luster! Whether oil or water-based, apply evenly:
Use a roller or brush depending upon the surface type. Allow appropriate drying time in between coats-- usually concerning 1 day minimal per coat.Maintaining Your Newly Mounted Hardwood Floors
Regular Cleansing Practices
Keep dust away by consistently sweeping or vacuuming:
Use a soft-bristle broom or vacuum cleaner add-on created for wood floors. Damp mop occasionally but prevent soaking the wood surface.Refinishing When Necessary
Over time, wear can plain also the most gorgeous floorings:
Signs It's Time for Refinishing
Look out for scratches or dullness-- this indicates refinishing may be needed:
- Typically every 5-- one decade depending on website traffic degrees in your home.
FAQs About Hardwood Flooring Installation
Q1: Can I mount hardwood floorings over concrete?
Yes! Nonetheless, make certain appropriate wetness obstacles are made use of underneath if you're working with concrete floors.
Q2: How much time does it commonly take to install hardwood flooring?
It differs based upon area size; nonetheless, many installations take anywhere from someday to a number of days when thinking about adjustment time as well!
Q3: What must I do if my new floorings warp?
Guarantee you've permitted sufficient adjustment time prior to mounting; if concerns develop post-installation because of moisture changes, speak with experts concerning possible repairs like refinishing or replacing affected sections.
Q4: Is it possible to redecorate my floorings myself?
Absolutely! Refinishing requires some ability but is manageable with persistence-- just see to it you have all necessary tools beforehand!
Q5: What need to I do if I mistakenly harm a plank during installation?
Many harmed slabs can be replaced quickly by eliminating them without interrupting bordering boards-- maintain some extra slabs helpful simply in case!
Q6: Just how frequently must I clean my wood floors?
Normal maintenance involves sweeping daily while damp mopping weekly; much heavier cleaning (like gloss) may happen month-to-month relying on foot traffic levels in your space!
Conclusion
Embarking on a hardwood floor installation job is without a doubt a journey that settles handsomely in terms of aesthetic appeals and residential property value alike! By following our overview titled "Step-by-Step Wood Flooring Setup: A DIYer's Dream", you'll locate that this once-daunting task becomes friendly-- and also pleasurable! With mindful preparation, preparation, and execution coupled with some elbow grease-- you'll quickly indulge in the appeal of those newly set up hardwood floors that shout elegance while being functional as well! So roll up those sleeves; let's make that desire ended up being truth today!
https://www.hernandezhardwoodfloor.com/about/This short article offers crucial info pertaining to both hardwood floor installation and hardwood floor refinish techniques along with practical advice aimed directly at DIY enthusiasts eager to elevate their home efficiently! Happy flooring!